Knowledge Base - Monster Patrol Routes
Monster Patrol Routes

The world of Doom has, for the most part, been a static world. Classically, things remained where you put them until the player acted upon them in some fashion. This was especially true of Doom monsters, that simply stood there waiting until the player walked into the room.
ZDoom has changed all that with the ability to set up patrol routes for your monsters. Monsters are no longer static objects, but are now interactive elements in your map.
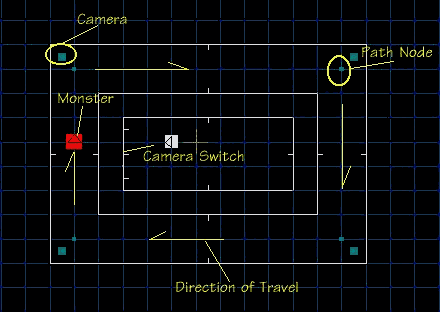
Figure 2 shows the map layout of the example wad, routes.wad.

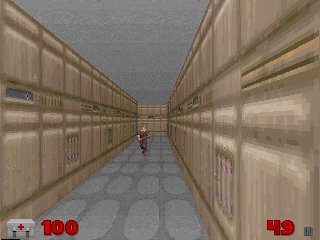
The cameras are so you can peek in on the monster as he makes his patrol. When the maps loads, the monster will start toward the first path node specified in the Thing_SetGoal special assigned to the monster.

Thing_SetGoal tag, goal, delay
- tag: This is the tag of the monster.
- goal: The tag of the destination path node.
- delay: The number of tics before the monster starts to move.
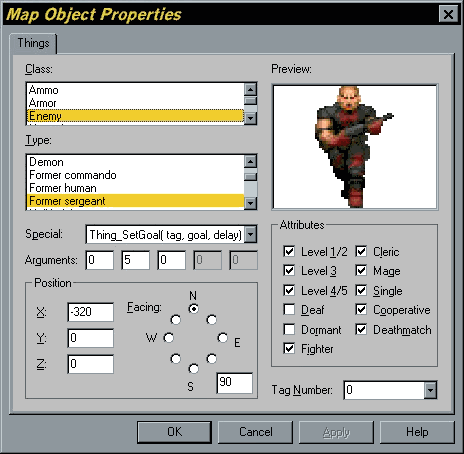
In Figure 3, the monster itself has the special assigned to it. In this case, the monster tag is zero, which indicates that the command will operate on the monster itself at map start up. You could also execute this command from a script. The first parameter would then be the tag assigned to the monster.
The second parameter is the tag of the path node. In this case, the monster will immediately begin to move to path node 5 since the delay field is set to 0.
In the map layout of Figure 2, the arrows indicate the direction in which the monster will move on its route. In fact, the monster only knows about the initial path node. In the map, this is the node directly above the red monster icon. In order to create a patrol route, you must link all the path nodes together.

Figure 4 shows how the path node is to be set up. The first parameter in the path node is the tag of the next path node. The tag is the circled field in Figure 4. The next parameter is the delay, measure in tics. In our example, the monster will pause at path node 5, for 5 tics, then proceed on to path node 6. Path node 6 points to 7 and node 7 point to node 8. Node 8 points to 5, which starts over the patrol route. In the example, the monster will walk around in circles, pausing at node 5 for 5 tics on each pass.
Routes are very simple to set up, but really add a nice level of interactivity to your maps.
